What are custom fields in WordPress and why do you need them?
Custom fields are a very useful feature for adding metadata or other information to an article or another WordPress entity (custom post type/taxonomies).
If you are using a theme or have created your own custom theme and its information fields do not cover the information you want to have for your entities, custom fields are what you are looking for. For example, you may want to add a modification date to your articles. Or you may want to add information about site users such as their job title. Or you may want to add extra information to a widget, such as a link or an image. When you want to add something to an object (e.g. an article or any custom post type) that has a specific location and appearance on your page you have to add it over and over again to each object individually, thus spending a lot of time. That’s where creating custom fields helps us. You can specify the style, look and location of these fields once and they will automatically appear where you want them. With a few lines of PHP and some CSS you can achieve the desired result.
It is also important that this technique helps us in SEO since we give search engines more content and details about the material we upload, making it more specific and richer.
Let’s look at an example in more detail. Let’s say we have a blog in which we write about gardening and growing plants. Under each article we want to mention the degree of difficulty of the particular crop, what season is ideal and a photo. We want these to appear in all articles in the same way, without having to put them in every time and spend time styling them or wondering if they are correctly aligned.
Good! How can we create our own custom fields?
We go to the editing of an article and then:
Top right, preferences > panels > additional > and enable custom fields.
Then at the bottom of the page has appeared:
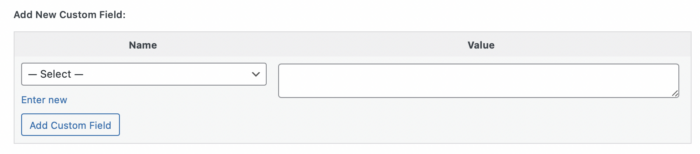
So let’s say we want to create a field that refers to the appropriate season for growing a plant. We can give the field the word season as the Name and next to the Value field we can fill in the content-answer, for example Summer. Of course, to display this field in the frontend some extra code is needed.
To display this information in the frontend we need to find the PHP file that is responsible for displaying our articles, known as a template.
[Attention! If you have a child theme, the following changes must be made in the child theme files or the code we add will be lost with the next update. To see how to make a child theme see here].
We do this via Appearance > theme editor, or via FTP. The file we are looking for is probably called single.php or post.php. We find where in the article we want the fields to appear and add the following commands.
<?php echo get_post_meta($post->ID, 'your_field_name', true); ?>
Field name is the name by which we refer to this field in PHP and in our example it is the word season.
If we insert this line inside a div and give it a class and fill in some text we can easily create any format we want.
<div class=“my-class-name”> Suitable season: echo get_post_meta($post->ID, 'your_field_name', true); ?> </div>
If we do everything right the result on our page will be: Suitable season: summer.
Tip: The main content of the article is usually found in the line <? php echo get_the_content(); ?> or something similar. If you locate this line you can have the custom fields appear before or after the main content.
If we want to add another type of custom fields other than plain text, e.g. image, we should use the Advanced Custom Fields plugin, a very popular tool.
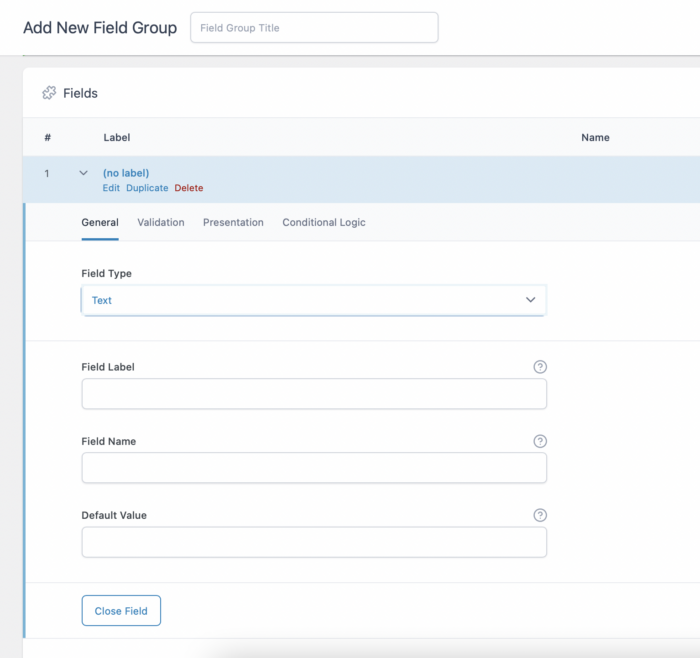
After installing and activating the Advanced Custom Fields plugin we go to the top right “Add New Field Group” and choose from the wide range of different fields: text, number, image, file, checkbox etc.
As before, our example is about growing plants. Field name again is the name by which we refer with PHP to our field, i.e. the word season while Field label is about the title of the field only in the backend and we can put the word Season.
Similarly to add a photo we need to configure the plugin to return an Image URL.
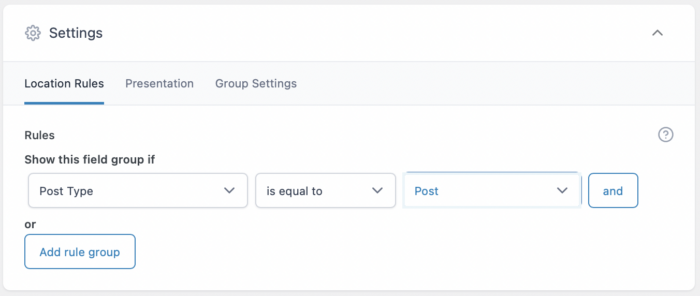
Then we make sure that this group field we create appears in the posts or depending on whether you have created some other custom post type.
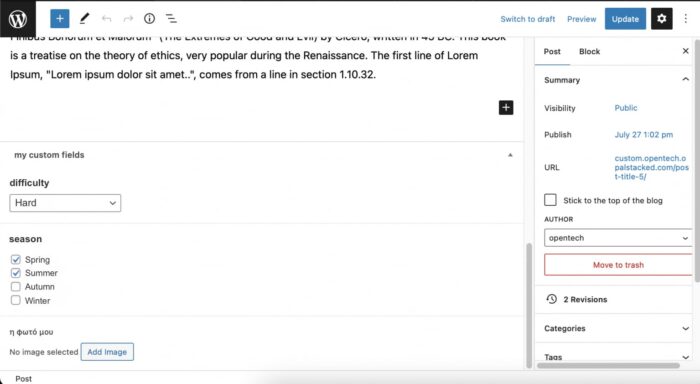
So, we create the following custom fields. Their type is shown on the right.
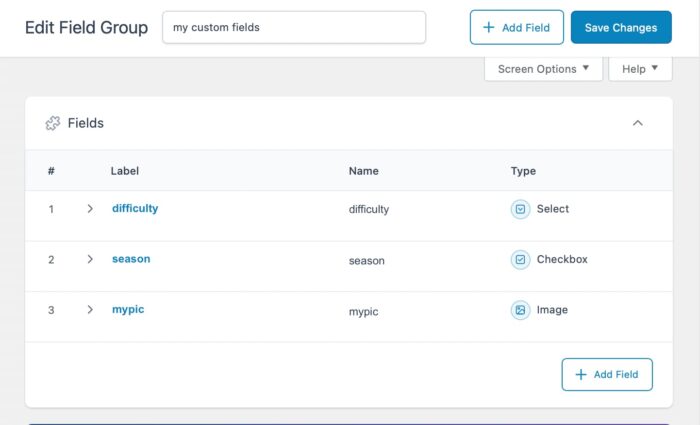
Now if we go to one of our articles we’ll see at the bottom of the page what we have created.
As before to display this information in the frontend we need to find the appropriate PHP file (single.php or post.php).
Inside this file we write:
<div class=“my-class-name”> Difficulty: <?php the_field('difficulty' ); ?> </div>
<div class=“my-class-name”> Suitable season: <?php the_field('season' ); ?> </div>
<img src="<?php the_field('mypic' ); ?>">
In the names of the Fields (difficulty, season, pic) you put your own names respectively.
If we do everything correctly the result on our page will be:
Difficulty: Difficult
Suitable season: Spring Summer
And then the photo you have chosen will be displayed.
In the PRO version of the plugin you can even create a gallery with multiple photos which allows you to create your own sliders or grids, opening up extra possibilities in custom WordPress theme development.
Let’s look at a particular application of these tools we’ve discussed. Let’s say we use the familiar example of plants. And that we have followed the steps as described in section 2. In this example we can define different styles for the four seasons: winter, spring, summer, autumn. So when we choose summer for example, the style of the article will adapt to this stylistic choice. E.g. if I choose winter it might change the background to a winter landscape or the layout of the text might come in the center.
Some more examples of how to use custom fields are the following:
- Accommodation website: number of rooms, capacity, price.
- Tourism content: weather, budget, type of trip.
- Movie review blog: rating, year of production, director, where to watch it (streaming, cinema, etc.).
- Portfolio of projects: year the project was created, tools used, etc.
In conclusion, custom fields can play an important role in organizing information and help us save time.
Sources:
- https://elementor.com/help/elementor-acf/
- https://www.advancedcustomfields.com/resources/
- https://wordpress.org/support/article/custom-fields/
- https://www.wpbeginner.com/wp-tutorials/wordpress-custom-fields-101-tips-tricks-and-hacks/
- https://wordpress.org/support/article/custom-fields/
- https://www.dreamhost.com/wordpress/guide-to-wp-custom-fields/
Do you have any questions? Contact with us here!


 <
< >
>