A custom WordPress theme:
- Is unique and you will certainly not find another one like it since it is created entirely by us.
- Is created according to our needs or the needs of a client.
- Is easily modified by us.
- Programmatically, it’s easier to add or remove pieces of code, either our own or off-the-shelf.
- You have full control over it.
In this guide, we will create a simple blog with 3 pages. We will show the process in detail so you can follow step by step. You can see the result here before we get started!
It is worth noting that creating a complete and accurate theme is a time-consuming process. This article is a basic guide and aims to provide the basic knowledge. On this basis a designer can step on to develop his theme as much as he wishes. No very specialized programming knowledge is required but it is definitely a plus to know basic HTML, PHP syntax, and be fluent in the use of WordPress.
First, we download WordPress to our computer by clicking here, so that we can work locally or we setup WordPress on our remote server if it provides us with this possibility.
We create a new folder in the wp-content/themes folder with the name of our theme. In this guide we’ll call it mytheme..
In the folder we just made, we create the files:
- index.php, includes the basic structure of the theme and the content displayed on our page. In our case, we will utilize it as a list of all posts.
- header.php, the header, the top of the page that usually contains the name or LOGO, a navigation menu, and social media links.
- footer.php, the footer, usually contains basic information such as the year the page was built, the copyright and other similar data and sometimes a secondary menu.
- single.php, the structure of a single article.
- about.php, the “About Us” page where we can write a few words about who we are.
- front-page.php, the homepage that the visitor sees.
- functions.php, is an absolutely essential file where we add WordPress functionalities and functions.
- style.css, responsible for the stylistic settings, in which should be included within comments, some meta data and details regarding the theme.
- script.js, includes javascript code.
Essentially, each .php file is a page or part of a website. Several people may get confused about the differences between single.php, index.php etc since depending on the site and its requirements, different files with different roles may be needed. The key thing is that index.php comes last in the hierarchy of a page. That is, in case no different architecture is defined for a page higher up in the hierarchy, the structure defined in index.php is followed.
See more about the hierarchy of pages here and for the anatomy of a page here.
Before we start adding code to our files it is important to emphasize that this guide does not focus so much on the stylistic part but our goal is to show how we can create the basic functionality of the pages with the help of PHP. If you are looking for exactly the same result as the demo website, you can find all the files here including the complete style.css file and copy the settings before adding the code below.
To get started, we open the style.css file and add some basic information about our theme that is necessary. Of course, you can fill it in with your own data.
/*
Theme Name: My Theme
Author: open-tech.gr
Author URI: https://www.open-tech.gr
Description: My first custom theme
Version: 1.0
*/
Then, in the functions.php file we add some basic functions that are needed. With the wp_enqueue_script command we can insert javascript files and stylesheets.
<?php

//adds the viewport meta tag to the header.php file
function add_viewport_meta_tag() {
        echo '<meta name="viewport" content="width=device-width, initial-scale=1.0"/>';
 }

add_theme_support( "menus" );

// Ability to create a Menu
If(function_exists("register_nav_menus")){
  register_nav_menus( array( $location => $description ) );
}

// Add functionality of selected images for articles
if(function_exists("add_theme_support")){
    add_theme_support( 'post-thumbnails' );
}

if(function_exists('add_image_size')){
  add_image_size( 'featured', 400, 250, true );
  add_image_size( 'post-thumb', 125, 75, true );
}

function create_post_type(){
  register_post_type( 'post-type-slug-name',
    array()
  );

}

//Prevents the <p> tag from getting automatically insterted
remove_filter('the_content', 'wpautop');

add_action( 'init', 'create_post_type' );


// load our JS script

function wp_load_script() {

    wp_enqueue_script( 'script-name', get_template_directory_uri() . '/script.js', array(), '1.0.0', true );
}
add_action( 'wp_enqueue_scripts', 'wp_load_script' );
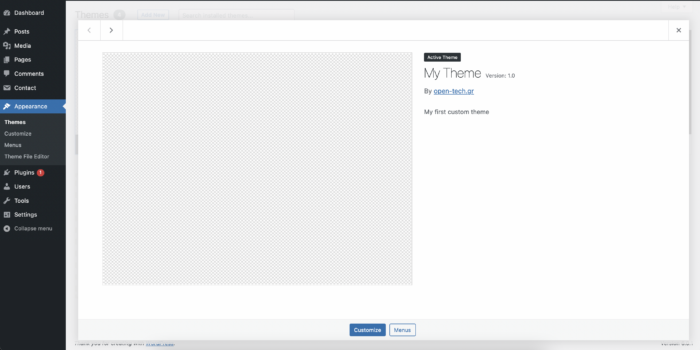
To make sure everything is ok we go to appearance > themes. The theme we created should have appeared with the information we inserted in styles.css.
In index.php we add a very basic text for verification.
<!DOCTYPE html>
<html>
<head>
    <title>My custom theme</title>
</head>
<body>
    <h2>My custom theme</h2>
    <p>If you can see this, you're in a good stage.</p>
</body>
</html>
When you enter the homepage of our website you should see the above text. This is a good sign that our website is working fine.
We continue by making the menu. This will allow the user to navigate through the pages of the site. We go to the functions.php file and add the following code.
// Addition of our custom menu in the header
function wpb_custom_new_menu() {
  register_nav_menu('my-custom-menu',__( 'My Custom Menu' ));
}
add_action( 'init', 'wpb_custom_new_menu' );
Then we go to wordpress > appearance > menu and create the menu we want. At the bottom where “display location” is listed we select “my custom menu” that we just created in functions.php.
We make 3 basic pages to start with – Of course you can name them as you like or add more pages depending on what you need.
- home
- archive
- about us
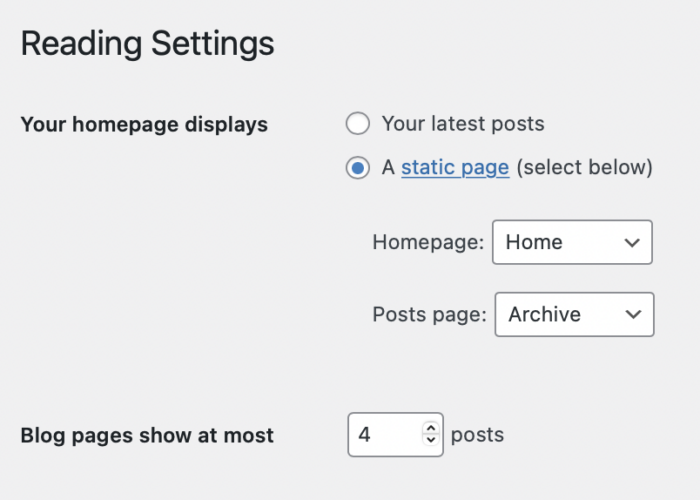
Then in settings > general you can edit the name, page description and other details. In settings > reading we set “a static page” and then choose ‘home’ for homepage and ‘archive’ for posts page. We choose how many articles we want to display per page.
Then we can make 5-6 short articles to have content to present later on our page.
Let’s go to header.php. We define a few things that every site needs like description, author, stylesheet, insert Font Awesome, jQuery and then under the body we add the lines of code that will display the menu we made earlier. Also, there is the div mobile-menu-container which only shows up on smaller screens.
<?php
/*
 * The header for our theme
 */

?><!DOCTYPE html>

<head>
	<meta charset="utf-8">
  	<meta http-equiv="X-UA-Compatible" content="IE=edge">
  	<meta name="viewport" content="width=device-width, initial-scale=1">
  	<meta name="description" content="this is a page for the custom theme">
  	<meta name="author" content="open.tech">
	<meta charset="<?php bloginfo( 'charset' ); ?>">
	<link rel="stylesheet" href="https://cdnjs.cloudflare.com/ajax/libs/font-awesome/6.1.2/css/all.min.css" integrity="sha512-1sCRPdkRXhBV2PBLUdRb4tMg1w2YPf37qatUFeS7zlBy7jJI8Lf4VHwWfZZfpXtYSLy85pkm9GaYVYMfw5BC1A==" crossorigin="anonymous" referrerpolicy="no-referrer" />
	<title> <?php wp_title('|',true,'right'); ?> <?php bloginfo('name'); ?> </title>
	<link rel="icon" type="image/png" href="https://custom.opentech.opalstacked.com/wp-content/uploads/2022/07/flaticon.png">
	<link rel="stylesheet" href="<?php echo esc_url( get_stylesheet_uri() ); ?>" type="text/css" />
	<script src="https://cdnjs.cloudflare.com/ajax/libs/jquery/3.6.0/jquery.min.js" integrity="sha512-894YE6QWD5I59HgZOGReFYm4dnWc1Qt5NtvYSaNcOP+u1T9qYdvdihz0PPSiiqn/+/3e7Jo4EaG7TubfWGUrMQ==" crossorigin="anonymous" referrerpolicy="no-referrer"></script>

<?php wp_head();?>
</head>


<body <?php body_class(); ?>>


<div class="mobile-menu-container">
    <a id="hamburger-icon" href="#" class="open-close-btn"><span></span>
        <span></span>
        <span></span>
        <span></span>
     </a>

    </div>
      <div id="myNav" class="overlay">
        <div class="overlay-content">

			<?php
				wp_nav_menu( array(
					'theme_location' => 'my-custom-menu',
					'container_class' => 'my-custom-menu' ) );
				?>
We see in the last line how we define the class ‘my-custom-menu’ so that we can modify it stylistically.
Then we make a side menu with the logo and social media links of the website.
<div class="social-medias">

	<div class=header-logo> <a href="https://custom.opentech.opalstacked.com/"><img src="https://custom.opentech.opalstacked.com/wp-content/uploads/2022/07/flaticon.png"></a></div>
	<div class="line"> </div>
	<div class="social-icon"> <a target="_blank" href="https://facebook.com"><i class="fa-brands fa-facebook-f fa-xl"></i></a></div>
	<div class="social-icon"> <a target="_blank" href="https://instagram.com"><i class="fa-brands fa-instagram fa-xl"></i></a></div>
	<div class="social-icon"> <a target="_blank" href="https://twitter.com"><i class="fa-brands fa-twitter fa-xl"></i></a></div>

</div>
In the footer.php file we will add a line with the copyright of the website.
<?php
/**
* footer
*
* @link https://developer.wordpress.org/themes/basics/template-files/#template-partials
*
*/
?>
<div class="empty-footer">
</div>
<footer id="site-footer">
<p class=""><?php bloginfo( 'name' ); ?> // created by <a target="_blank" href="https://open-tech.gr">open tech</a> © <?php echo date_i18n(_x( 'Y', 'copyright date format', 'twentytwenty' )); ?> </p>
</footer>
<?php wp_footer(); ?>
</body>
</html>
Let’s go to the front-page.php file to start adding the content that will be displayed on our home page.
<?php
/**
 * Template Name: front page
 */
?>
<?php include 'header.php'; ?>

<div class="front-page-content">

	<div class="front-section">

		<div > <h1><?php bloginfo('name'); ?></h1></div>
		<div class="front-page-cover">
			<img class="front-photo" src="https://custom.opentech.opalstacked.com/wp-content/uploads/2022/07/pexels-kristina-paukshtite-712876-2.jpg">
			<div class="front-page-square">
				<div class="header2"><?php bloginfo('description'); ?></div>
			</div>
		</div>


	<div class="mouse">
		<section id="example" class="example "><span class="scroll-icon"><span class="scroll-icon__dot"></span></span></section></div>
	</div>


	<div class="front-words"> LEARN ● PLANT ● REPEAT</div>

		<div class="front-desc"> New to gardening? Browse our list of hints and tips on getting started, sowing, planting and creating wildlife habitats.
Gardening is fun and rewarding. What could be nicer than eating food you have grown yourself or eating an evening meal on the patio surrounded by the fragrance of scented plants you have grown? It can be hard to know when and how to start a garden, but we’re here to guide you through the process.</div>


	<div class="landing-button"> <a href="/about-us">read more</a></div>

	<div class="front-featured-posts"> Featured Posts </div>

	<div class="front-posts-container">

		<?php $recentPosts = new WP_Query(); $recentPosts->query('showposts=3&tag=featured'); while ($recentPosts->have_posts()): $recentPosts->the_post(); ?>

		<div class="front-preview-post">
			<a class=" preview-post-link" href="<?php the_permalink(); ?>">
				<div class=" preview-post-thumb"><?php the_post_thumbnail(); ?></div>
				<div class=" preview-post-title"><?php the_title(); ?></div>
				<div class=" preview-post-date"><?php echo get_the_date(); ?></div>
				<div class=" preview-post-excerpt"><?php the_excerpt(); ?></div>
			</a>
		</div>


		<?php endwhile; ?>
	</div>

</div>


<?php wp_footer(); ?>
<?php include 'footer.php'; ?>
</body>
</html>
Let’s explain the above code a bit. At the top of the code we see
<?php
/**
 * Template Name: front page
 */
?>
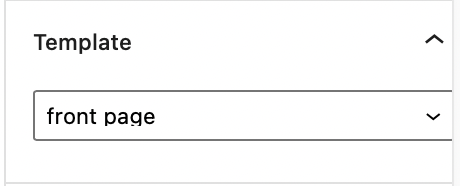
This way we give a name to our template. Then to use it on a page we go to pages > home and in the right menu of WordPress we select Template > ‘front page’.
With the command
<?php include 'header.php';?>
the header is displayed with the menu we created earlier. We then display the name and description of the site set by the WordPress settings.
<?php bloginfo( 'name' ); ?>
<?php bloginfo( 'description' ); ?>
Among the code there are divs, information, titles and images that are clearly the content we want to present – it has nothing to do with the theme.
The most important point is right after the “Featured Posts”. There is a condition in which if there are posts, they will appear.
<?php $recentPosts = new WP_Query(); $recentPosts->query('showposts=3&tag=featured'); while ($recentPosts->have_posts()): $recentPosts->the_post(); ?>
We created a query with which we display 3 posts that have the tag featured because in the original we want to display only the most important articles that we have set their tags from the backend when we create them. Similarly, we could display articles based on their categories.
$recentPosts->query('showposts=3&cat=YOUR_CATEGORY');
Then we make the div front-preview-post which implies that it contains the preview of an article and then with the commands:
<?php the_post_thumbnail(); ?>
<?php the_title(); ?>
<?php the_excerpt(); ?>
we take the data of the specific article and display it. They are inserted between divs with classes for ease of stylistic changes.
See more about the available PHP functions you can use here.
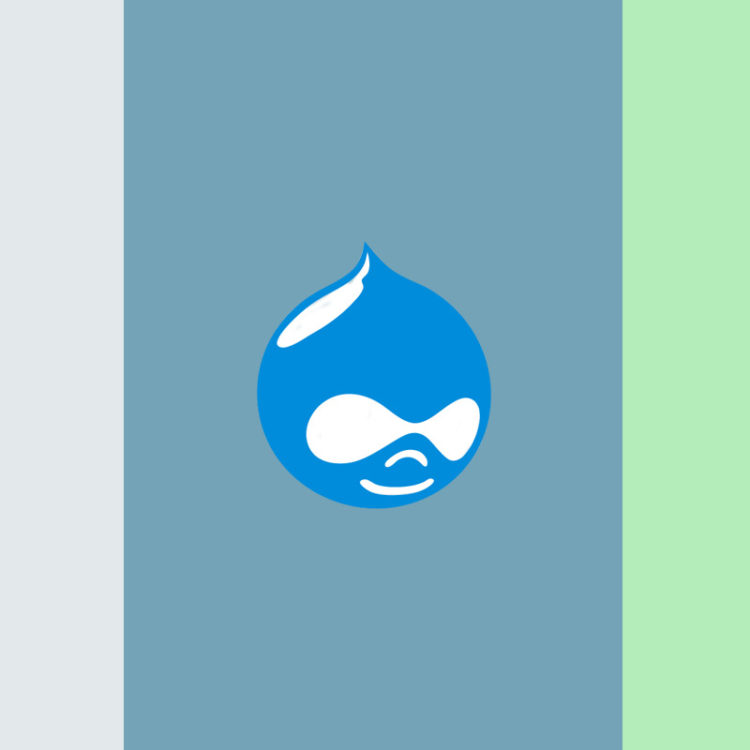
At this point on our homepage, we should see the menu, the title, the information, the articles and finally our footer. If you have added the styles we gave at the beginning you should see this.
In the index.php file which contains the list of all our articles we add:
<?php
/*
Template Name: archive
*/
?>
<?php include 'header.php';?>

<div class="front-page-content">

	<h1 class="main-header">Archive</h1>

	<div class="posts-container">


		<?php if ( have_posts() ) : while ( have_posts() ) : the_post(); ?>

		<a class=" preview-post-link" href="<?php the_permalink(); ?>">
			<div class="preview-post">
					<div class=" preview-post-thumb"><?php the_post_thumbnail(); ?></div>
					<div class=" preview-post-title"><?php the_title(); ?></div>
					<div class=" preview-post-excerpt"><?php the_excerpt(); ?></div>
					<div class=" preview-post-date"><?php echo get_the_date(); ?></div>
			</div>
		</a>

		<?php endwhile; ?>

		<div class="pagination"> <?php echo paginate_links(); ?></div>

		<?php else: ?>

		<p>No posts found :(</p>

		<?php endif; ?>

	</div>

</div>
<?php wp_footer(); ?>
<?php include 'footer.php';?>
</body>
</html>
Explanation: As on the front page we add the header and then with PHP we make a loop to display the articles (this time without any filtering) and display their information. Before the end of the page we added the command:
<?php echo paginate_links(); ?>
which creates the navigation between pages if there are many posts and depending on the limit of posts per page we set a few steps earlier.
Otherwise, the following commands can be used if you don’t want the page numbers to be shown:
<?php previous_posts_link( 'Older posts' ); ?></div>
<?php next_posts_link( 'Next posts' ); ?></div>
Ιn the file about.php
<?php
/**
* Template Name: about
*/
?>
<?php include 'header.php';?>


<div class="about-container">

<h1 class="about-title">About Us</h1>


<div class="about-image-desc">


	<div class="about-image"> <img src="https://custom.opentech.opalstacked.com/wp-content/uploads/2022/07/about.jpg"> </div>

	<div class="about-desc">"Sed ut perspiciatis unde omnis iste natus error sit voluptatem accusantium doloremque laudantium, totam rem aperiam, eaque ipsa quae ab illo inventore veritatis et quasi architecto beatae vitae dicta sunt explicabo. Nemo enim ipsam voluptatem quia voluptas sit aspernatur aut odit aut fugit, sed quia consequuntur magni dolores eos qui ratione voluptatem sequi nesciunt. Neque porro quisquam est, qui dolorem ipsum quia dolor sit amet, consectetur, adipisci velit, sed quia non numquam eius modi tempora incidunt ut labore et dolore magnam aliquam quaerat voluptatem. Ut enim ad minima veniam, quis nostrum exercitationem ullam corporis suscipit laboriosam, nisi ut aliquid ex ea commodi consequatur? Quis autem vel eum iure reprehenderit qui in ea voluptate velit esse quam nihil molestiae consequatur, vel illum qui dolorem eum fugiat quo voluptas nulla pariatur?"</div>

</div>
On the page about us there are 3 basic data:
- an image
- a description
- a contact form
In order to add a functional contact form to our page we must first install the “Contact Form 7” plugin. When we activate it and create a form we can see that it gives us a shortcode.

You have to enter respectively the shortcode it gives you in the echo do_shortcode field.
<div class="about-contact-title">Do you have a question?</div>

<div class="about-contact">
	<?php echo do_shortcode('[contact-form-7 id="46" title="Contact form 1"]'); ?>
	</div>

</div>

<?php wp_footer(); ?>
<?php include 'footer.php';?>
</body>
</html>
Finally, we have the script.js file that serves the menu functionality for smaller screens. With each user click, we can add or remove the two classes respectively to make the menu appear or disappear respectively.
$( ".open-close-btn" ).on('click touchstart', function(e) {
    e.preventDefault();
    $(".overlay").toggleClass("overlay-open");
    $("#hamburger-icon").toggleClass("hamburger-open");
});
These were the most basic things to start your first custom WordPress theme. Custom WordPress Theme building has several things to take into consideration. However, it’s worth the effort and we hope that with this short guide we have motivated you to look into it more thoroughly. The purpose of this article was to show the initial steps of the process and to encourage new web designers to execute their own ideas.
[updated 01.08.22. Β. Γαβριηλίδης & Π. Μουτσιούνας]
Code
Here on Github you will find all the code to get the same result as us.
Sources and useful links:
https://codex.wordpress.org/Function_Reference/
https://codex.wordpress.org/Theme_Development
Do you have questions? Contact us here!


 <
< >
>